Fur Infection LITE VR VR Checklist for LITE
Do this once per session so the Fur Virus is the problem — not the headset.
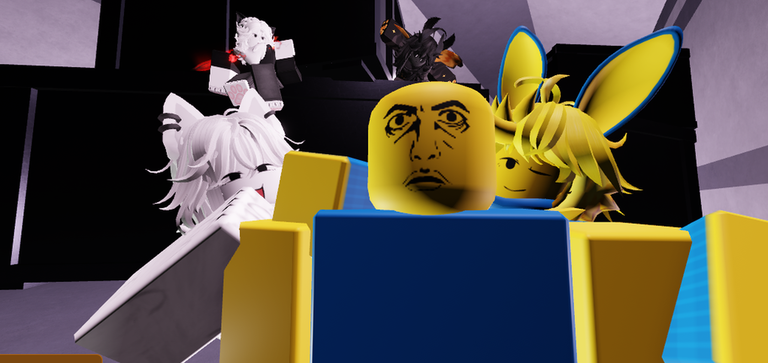
Fur Infection LITE VR advertises headset play in the live Roblox title. That does not mean VR boots itself. Work this checklist before you take a bat into a hallway. Parent hub: tools. After the headset behaves, pick a spawn plan on the loadout tool.
This page is hardware and comfort. It is not a Fur Hub tutorial. Script overlays are painful with a laser and still ban-eligible — see script safety if that is why you are here.
Once on the PC (or supported runtime host)
- Headset runtime running — SteamVR, Meta Link / Air Link, or your vendor runtime must be tracking before Roblox can help you.
- Enable Roblox VR in Roblox settings. If the toggle is off, LITE cannot invent headset mode for you.
- Confirm a known-good VR Roblox experience (simple hands test) so you know the stack works before blaming HopeStar.
- Recenter standing or seated. Infection PvP in a twisted playspace is how people hit a physical wall mid-grab.
- Prefer a cable or a stable wireless link. A busy 30-player melee lobby plus tracking loss is a free death.
Official place and studio links live on wiki so you join LITE VR, not a lookalike.
Every LITE VR session
- Join Fur Infection LITE VR, not Outbreak, unless you meant the sibling title.
- Spawn. Do not walk out yet.
- Point the laser UI at the shop and HUD. If buttons sit behind you, snap turn — do not full-body spin into a desk.
- Learn trigger = click versus grip. One confirms UI; one may be grab/grip depending on your bindings. Test in spawn on empty panels.
- Swing at the air and watch the cooldown feedback. VR melee feels longer than the hitbox; lunging into colliders ghosts swings.
- Recenter again if the world tilts after a messy standing adjustment.
- Buy Kit A or B from the loadout tool before you leave. Shop UI is slower in VR; finish the click while you still have eyes on the door.
Comfort and nausea tips
- Turn snap turn on. Smooth turn plus a morph in your face is how headsets come off.
- Enable vignette / comfort mode if you are new to Roblox VR.
- Seated play is valid. Standing is not a rank.
- Keep volume high enough to hear footsteps; music can wait.
- Lower graphics until dark halls are readable. LITE is already dim.
- If nausea hits, sit in spawn — not in a goo puddle. You are allowed to take a break; morphs filling the lens is a real advantage for them.
A five-minute comfort test: stay in spawn with snap, vignette, and seated on. Watch a teammate walk past. If that already feels bad, play flatscreen tonight and use Getting Started instead of forcing a migraine.
Look up for hanging morphs
LITE art and facility design reward vertical awareness. Players who only laser the floor loot eat rail grabs and ceiling hangs. Make “chin up at chokes” part of the checklist:
- Before turning a corner, flick the headset upward once.
- When looting a vest, check above the rack, not only the prompt.
- Duo partners on Kit C should call “above” the same way they call “behind.”
Looking down at shiny tools is how intentional infected players on Kit D get free conversions.
Combat notes that are VR-specific
- Morphs occupy more of your field of view than on a monitor. Back up earlier than flatscreen guides suggest.
- Shop and menu billboards need the laser; punching the world does not click UI.
- Grab prepare binds still matter when you morph — practice them in a quiet moment, not during a chase.
- Cooldown discipline matters more when your arms feel powerful. Watch the bar, not your real-world shoulders.
Deep role tactics stay on guides and players. This checklist only keeps the headset from being the reason you lose.
When VR “does not work”
| Symptom | Likely fix |
|---|---|
| Black screen | Runtime not running, or Roblox VR toggle off |
| World tilted | Recenter |
| Cannot click HUD | Laser aimed at world geometry, not the billboard |
| Cannot grab | You are still on human tools — morph first |
| Melee ghosting | You lunged into a collider; watch cooldown, shorten swings |
| Nausea spike | Snap turn, vignette, seated, take a spawn break |
If the live title ever drops the VR tag, this checklist still helps anyone forcing Roblox VR. Until then, treat headset support as a feature you enable, not a second downloadable game.
Scripts and VR
Fur Hub-style GUIs are 2D overlays. Clicking Hit Assist with a laser is miserable, easy to mis-toggle, and still a Terms of Service break. HopeStar bans exploiters whether you are on a monitor or a Quest link. Do not “test” injectors in VR public lobbies. Read scripts only for education, then come back to snap turn and Light Vest.
Session closeout
- Runtime on, Roblox VR on, LITE joined.
- Recenter, laser UI verified, trigger = click confirmed.
- Snap turn and nausea settings sane.
- Look-up habit armed.
- Kit chosen on loadout.
- Official links bookmarked via wiki if Discord shouts matter tonight.
Clear those six and the Fur Virus can be the problem again. That is the entire point of this featured tool page.
Frequently Asked Questions
Quick answers for Fur Infection LITE VR on Roblox.
Does Fur Infection LITE VR support Quest?
If your PC runtime (or a currently working Roblox VR path) supports that headset, enable Roblox VR first, then join LITE.
What does trigger = click mean?
Use the trigger to activate laser UI buttons in Roblox VR. Confirm in spawn before you need the shop under pressure.
Why do grabs feel worse in VR?
Morphs fill the lens. Back up earlier, keep cooldown discipline, and look up for hanging forms.
Should I use scripts in VR?
No. Overlays are unusable with a laser and the ban risk is unchanged. See script safety.
What kit should I buy after the checklist?
Use the loadout tool — usually Kit A or Kit B once the laser can hit the shop.